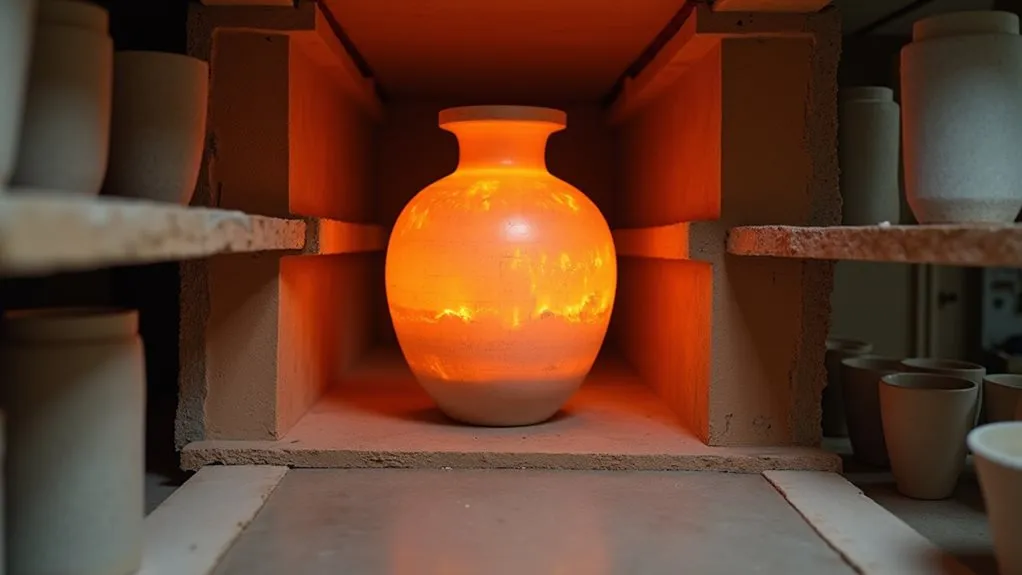
Yes, ceramic pieces are typically fired multiple times! Your first firing, called bisque firing, happens at around 1,800°F-2,000°F and transforms your raw clay into a hardened, porous state. Then, you'll need at least one more firing after applying glaze, usually at 1,200°F-1,300°F, to create that smooth, waterproof finish you're looking for. Many artists fire their pieces up to 10 times to achieve complex decorative effects, layering different glazes and special techniques. While it might sound intense, each firing adds unique character to your work – there's a whole world of possibilities waiting in those multiple trips to the kiln.
The Basics of Multiple Firings
The journey from raw clay to finished ceramic involves a carefully orchestrated sequence of firings.
You'll typically start with bisque firing, which transforms your raw clay into a hardened, porous state that's perfect for glazing. Think of it as giving your piece its first taste of the heat while making it strong enough to handle the glazing process without falling apart in your hands.
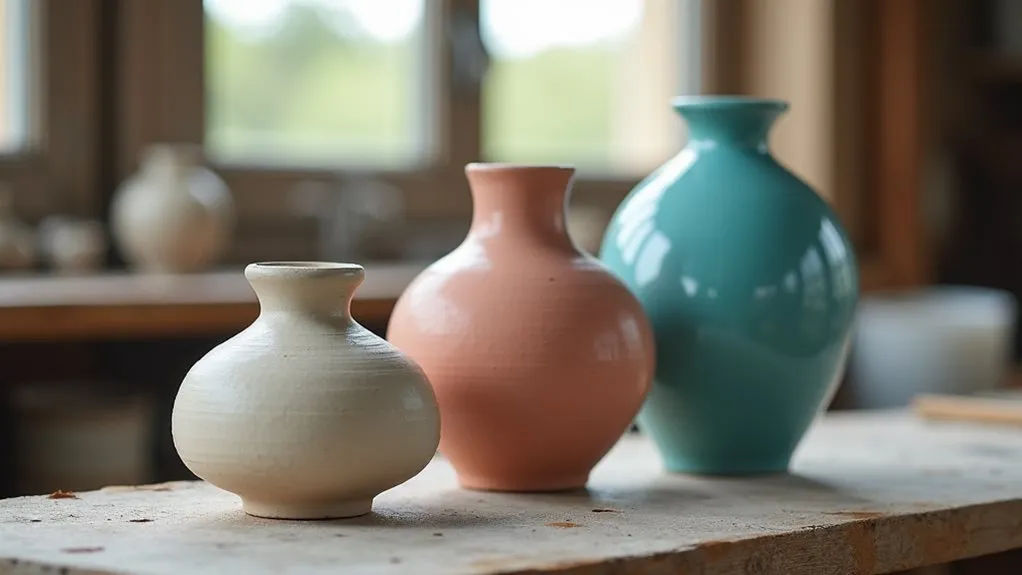
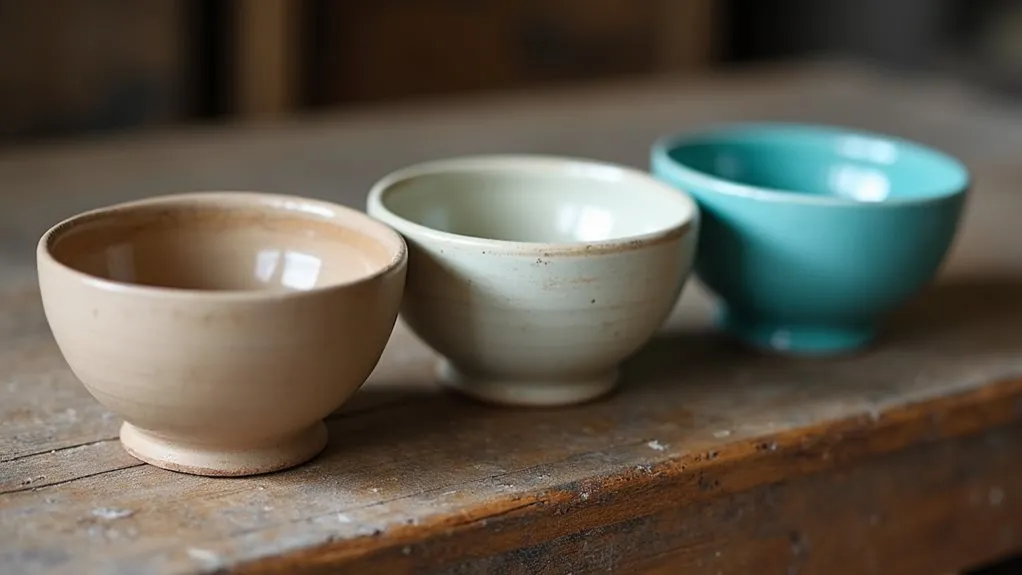
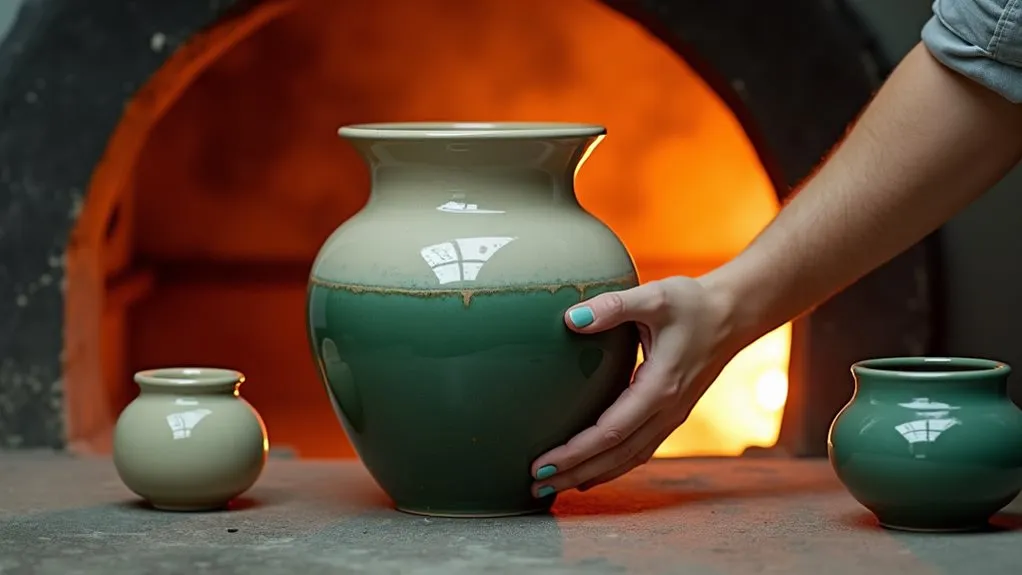
When you're ready to add that beautiful glossy finish, you'll move on to glaze firing. This is where the magic happens – your carefully applied glazes will melt and fuse to the surface, creating that smooth, waterproof finish you're looking for.
If you're using underglazes, you'll apply these before the glaze firing to achieve those vibrant colors and detailed patterns you've planned.
You'll need to be strategic about your firing choices, as each trip to the kiln affects your piece's structure. The first bisque firing typically reaches 1,800 to 2,000 degrees Fahrenheit to properly prepare the clay.
Whether you're using an electric kiln for precise control or a gas kiln for those special atmospheric effects, you'll want to carefully consider your firing schedule. It's like cooking – timing and temperature are everything!
Common Reasons for Multiple Firings
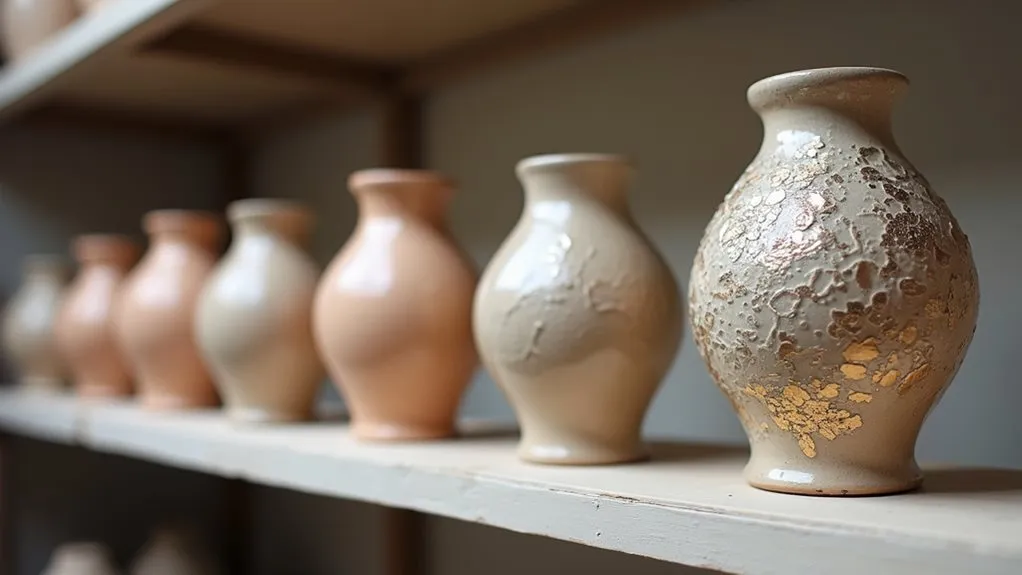
You'll discover that multiple firings aren't just about being extra careful – they're often necessary when you're adding decorative layers, each needing its own firing temperature and timing. For instance, the elegant Blue & White Porcelain Ring Holder with gold lustre signifies a result of meticulous craftsmanship that often requires multiple firings. When you're working on complex pieces, firing them gradually through different stages can help prevent cracks and guarantee everything stays intact.
If you're aiming for those stunning, multi-layered glaze colors that make everyone say "wow," you'll need separate firings to develop each unique shade and effect. Many ceramists also refire pieces when high melt fluidity glazes create surface blisters during the initial firing.
Decorative Layer Requirements
Multiple firings play an essential role in achieving complex decorative effects on ceramic pieces. When you're working with different decorative layers, you'll often need separate firings to achieve your desired results. You can start with a base glaze firing at a specific temperature, like Cone 6, and then add additional layers for more intricate designs. Proper safety equipment and ventilation is crucial when applying multiple glaze layers. Additionally, using high-quality materials like fine porcelain can enhance the overall aesthetics of your finished piece, similar to the craftsmanship found in tealight holders.
If you're looking to create stunning visual effects, you'll want to understand how different layers interact. For instance, you can apply metallic overglazes or lustre finishes after your initial firing for that extra pop of brilliance.
You'll need to be careful, though – you can't fire at a higher temperature than your previous firing, or you might lose those beautiful effects you've already created. When you're planning your decorative layers, it's smart to think about temperature limitations and potential glaze reactions.
Just like building a sandwich, each layer needs to complement the others! Consider using low-fire glazes for accent colors or china painting techniques to add those perfect finishing touches.
Safety Through Gradual Firing
While decorative effects depend on multiple firings, safety and stability form the backbone of successful ceramic production. You'll find that gradual firing isn't just a suggestion – it's vital for preventing your precious pieces from cracking or, worse, exploding in the kiln.
Think of firing ceramics like helping a friend adjust to a new situation – you wouldn't throw them into the deep end right away! Your clay needs time to release moisture gradually, and proper airflow helps steam escape without causing damage. A piece can undergo up to 10 firings while maintaining its structural integrity.
When you're working with different materials, you'll need to be extra patient, as fine-grained clay bodies require slower firing schedules to prevent unwanted surprises.
The bisque firing is your first essential step, transforming your clay into a stable, hard state that's ready for glazing. It's like creating a strong foundation for a house – you wouldn't build on shaky ground!
Each subsequent firing needs careful temperature control, especially as you approach the vitrification point. Don't rush this process; controlled heating and cooling will prevent thermal shock, ensuring your ceramic pieces emerge from the kiln strong, stable, and ready for their intended purpose.
Complex Glaze Color Development
The art of glaze color development demands multiple firings to achieve rich, complex effects that can't be replicated in a single firing.
You'll discover that each firing adds depth and character to your piece, much like layering paint on a canvas. When you work with metal oxide colorants, you're fundamentally conducting a beautiful chemistry experiment, where colors deepen and transform with each firing cycle. Understanding that host glaze chemistry must align with your desired colors is crucial for successful results.
To master complex glazing, you'll want to reflect on these key factors:
- Start with lighter colors and gradually build up to darker ones, preventing oversaturation that could muddy your design.
- Keep your firing temperatures lower with each subsequent firing to protect previous layers.
- Document your progress with photos between firings to track color development.
You can fire your pieces multiple times (even up to 10 or more!) to achieve stunning effects, but remember that each firing affects the clay body's strength.
Whether you're using an electric or gas kiln, you'll find that atmospheric conditions play a huge role in color development. It's like being a ceramic chemist – you're combining science and artistry to create unique, vibrant pieces that showcase your creativity.
Types of Sequential Firings
You'll find that sequential firings in ceramics follow specific patterns, with the most common being a bisque firing followed by one or more glaze firings.
When you're working with onglaze techniques, you'll need to plan multiple firings at different temperatures to achieve those stunning layered effects you're after.
Whether you're creating simple functional pieces or complex decorative works, understanding these firing sequences lets you build up your ceramic masterpiece step by step, just like following a trusted recipe. Raku pieces require a special approach where the hot ceramic is removed while glowing and placed in combustible materials to create unique effects.
Common Firing Sequences
Ceramic artists employ several distinct firing sequences to transform raw clay into finished pieces, with each sequence serving specific purposes and achieving different results.
You'll find that the most common approach is the bisque and glaze firing sequence, where your piece gets fired twice – first to harden the clay, then again to set the glaze.
Here's what you should know about the most popular firing sequences:
- The bisque firing happens at around 1000°C to 1100°C, turning your raw clay into a sturdy, porous state that's ready for glazing.
- The glaze firing follows at higher temperatures (typically 1200°C to 1300°C), melting your glaze into a beautiful, glossy finish.
- Multiple firing sequences let you layer different glazes and effects, but you'll need to fire at progressively lower temperatures to protect previous layers.
If you're feeling adventurous, you might want to try reduction firing, where you'll control the oxygen levels in the kiln to create stunning effects.
It's like cooking with clay – sometimes you'll want a slow roast, and other times you'll need a quick fire to get just the right result!
Modern digital kilns with ramp-hold programming allow precise control over firing sequences, making it easier to achieve consistent results across multiple firings.
Onglaze Application Methods
Throughout the ceramic firing process, artists employ various onglaze application methods to achieve their desired results. You'll find that the journey often begins with a bisque firing at around 1800°F, which creates the perfect canvas for your artistic vision.
Think of it as prepping your walls before painting – it's essential for what comes next!
When you're ready to add color, you've got some exciting choices. You can start with underglazes, which let you create detailed designs and patterns before the final glaze. Many artists use the two coat technique to ensure optimal coverage when applying underglazes. It's like drawing with colored pencils, but your artwork will last forever!
After that, you'll apply the overglaze using techniques like brushing, pouring, or dipping. This final layer seals everything in and makes your piece waterproof and durable.
Sometimes, things don't go exactly as planned (we've all been there!), and that's where re-firing comes in handy. If you notice any imperfections or uneven spots in your glaze, you can often fire your piece again to fix these issues.
Just remember that not all pieces can handle multiple trips to the kiln, so it's best to aim for perfection in your first glaze firing.
Multiple Temperature Firing Steps
The sequential firing process builds upon basic onglaze techniques by introducing multiple temperature stages that transform your ceramic pieces.
You'll find that each firing adds new dimensions to your work, but you'll need to follow specific temperature guidelines to guarantee success. Think of it like building layers of flavor in cooking – each firing adds something special to your creation!
When you're planning multiple firings, here's what you'll typically follow:
- Start with bisque firing at 1000-1100°C to prepare your clay body.
- Move on to your main glaze firing at 1200-1300°C to set your base glazes.
- Add decorative elements with lower-temperature firings (like metallics or lustres).
You can't go wrong if you remember the golden rule: always fire from highest to lowest temperatures. Modern electric kiln controllers help manage these precise temperature changes automatically for optimal results.
It's like climbing down a ladder – you wouldn't want to climb back up after coming down! Each subsequent firing needs to be cooler than the last, or you'll risk melting previous layers.
Don't worry if this sounds complex – with practice, you'll develop an instinct for the right firing sequence.
Temperature Ranges and Firing Steps
From delicate earthenware to robust stoneware, firing temperatures play a crucial role in determining your ceramic piece's final characteristics.
You'll start with bisque firing at around 1,830°F (Cone 06), which prepares your piece for glazing by removing moisture and creating a strong foundation. Think of it as giving your pottery a warm-up before the main event!
For your final firing, you've got three main temperature ranges to choose from.
If you're creating colorful decorative pieces, you'll want to stick with low-fire temperatures (1,700°F-2,100°F). It's perfect for those vibrant glazes that'll make your wall hangings pop! Electric kilns are especially suitable for beginners working with low-fire pottery.
Mid-range firing (2,100°F-2,300°F) is your sweet spot for functional pottery, offering that perfect balance between durability and artistic flexibility.
And if you're crafting pieces that need to withstand daily use, like dinnerware, you'll want to go with high-fire temperatures (2,300°F-2,700°F). These higher temperatures create denser, more durable pieces that'll stand up to whatever your kitchen throws at them – literally!
Kiln Atmosphere and Results
Inside your kiln, the atmosphere plays a make-or-break role in determining your pottery's final appearance and durability.
You'll find that different kiln types create distinct atmospheres – electric kilns give you predictable oxidation, while gas kilns offer both oxidation and reduction options.
Think of it like cooking: you wouldn't use a microwave to get that perfect wood-fired pizza taste!
When you're planning multiple firings, you'll want to take into account these vital factors:
- Each firing can make your piece more brittle, so you'll need to be extra careful with temperature control.
- Low-temperature firings in oxidation are gentler on your work, perfect for techniques like China painting.
- Firing in reduction and then re-firing in oxidation might give you unexpected (and sometimes unwanted) results.
You can't just throw your pieces in the kiln and hope for the best – proper loading and airflow are essential. Both glazed and bisque pieces can be fired in the same load.
If you're using glazes, you'll need kiln wash and star stilts to protect your kiln's shelves.
It's like giving your pottery a comfy, safe bed to rest on during its fiery transformation!
Effects on Clay Bodies
Clay bodies undergo dramatic transformations during the firing journey, following distinct stages that reshape their molecular structure forever.
You'll first notice water evaporation, or "water smoking," happening at around 212°F – think of it as your clay taking a really hot sauna! This vital step prevents your piece from going boom from steam buildup.
As temperatures climb, you'll hit the point of no return at 1022°F, where your clay says goodbye to its plasticity forever through dehydroxylation. It's like your clay's getting a permanent makeover! A slow heating rate during this phase is crucial to prevent steam explosions.
At higher temperatures, you'll see some fascinating changes: quartz transforms above 2012°F, and those tough little mullite crystals form at 1922°F, giving your piece its strength and attitude.
But here's the thing – you can't rush this process. If you're impatient and cool your pieces too quickly, you're asking for trouble.
Those temperature changes need to happen gradually, or you'll end up with cracks and dunting (that's potter-speak for thermal shock damage).
Think of it like tempering chocolate – rush it, and you'll regret it!
Glazing Between Firing Stages
Getting your glazing stages right can make or break your ceramic masterpiece. When you're ready to glaze your pieces, you'll need to understand that different glazes require specific firing temperatures and conditions. You'll find that most glaze firing happens between 1200°C and 1300°C, turning your carefully applied coating into a beautiful, glassy surface.
Each firing typically requires 8 to 12 hours to complete properly.
Here's what you need to know about multiple firings:
- You can fire your pieces several times to layer different glazes, creating unique effects.
- Each firing needs proper drying time to prevent your piece from cracking or exploding.
- The type of kiln you're using will affect your glaze results – electric kilns offer precision, while gas and wood kilns can give you those dreamy, one-of-a-kind finishes.
You'll want to be careful not to over-fire your pieces, as this can weaken your clay body or completely change your glaze's appearance.
Remember, it's like baking a cake – timing and temperature are everything!
Whether you're using an electric, gas, or wood kiln, proper ventilation is essential to prevent steam buildup and guarantee your glazes turn out just right.
Managing Multiple Firing Risks
While mastering glaze applications sets the foundation for beautiful ceramics, understanding the risks of multiple firings will protect your work from potential damage.
You'll want to pay close attention to your clay body's characteristics, as different types handle repeated firings differently – think of it like knowing your car's limits on a long road trip! Watch for quartz expansion issues during temperature changes, as these can lead to cracking in dense clay bodies.
When you're planning multiple firings, you'll need to manage several key variables. Keep your glaze layers thin (nobody likes a thick, goopy mess!), and always guarantee your pieces are completely dry before they hit the kiln.
You'll also want to monitor your firing temperatures carefully – those pyrometric cones are your best friends in this process.
The kiln atmosphere plays an essential role too, so you'll need to maintain proper ventilation and control throughout each firing.
Keep detailed records of your firing schedules, temperatures, and results – these notes will become your personal roadmap to success.
Best Practices for Success
Before you begin any firing session, mastering fundamental best practices will greatly improve your chances of success.
You'll want to pay special attention to your firing schedule, especially when working with larger pieces that need a gentler approach. It's like teaching a child to swim – you wouldn't just throw them in the deep end! Working with digital controls on electric kilns can make monitoring and adjusting your schedule much easier.
When it comes to successful firing, here are three essential practices you can't ignore:
- Always use pyrometric cones to monitor temperature variations – they're your best friends in understanding what's really happening inside your kiln.
- Apply wax resist to the bottom of your pots (trust me, you don't want them becoming permanent residents on your kiln shelf!).
- Maintain consistent loading patterns, keeping thicker pieces toward the center where heat distribution is most even.
Final Thoughts
Just like a butterfly emerging through different stages, your ceramic piece often needs multiple firings to reach its full potential. You'll find that each firing stage, from bisque to glaze, adds another layer of magic to your creation. Whether you're crafting a delicate vase or a sturdy mug, understanding these firing stages is key to success. With patience and proper technique, you'll transform raw clay into lasting treasures that'll sparkle with life.